We can draw a floor plan in minutes with Microsoft Visio. In this post we will show how to create simple floor plan using Microsoft Visio.
Take a blank Visio Page.
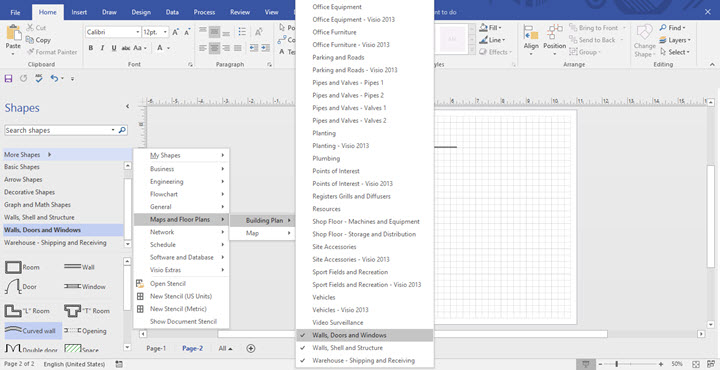
Go to More Shapes –> Maps & Floor Plans –> Building Plan –> Walls, Door & Windows.

Drag the wall to the page and extend it till you need it. Connect the wall as you need it.
Drag the door and leave it on the wall where you want to place it. You can do the same with double door, opening and windows.
To make the work easier, Insert the picture of the plan you want to draw and position it on the page. Start drawing over it. After completing, remove the background. The floor plan is done. You can glue to geometry if any of the wall is not connected properly.

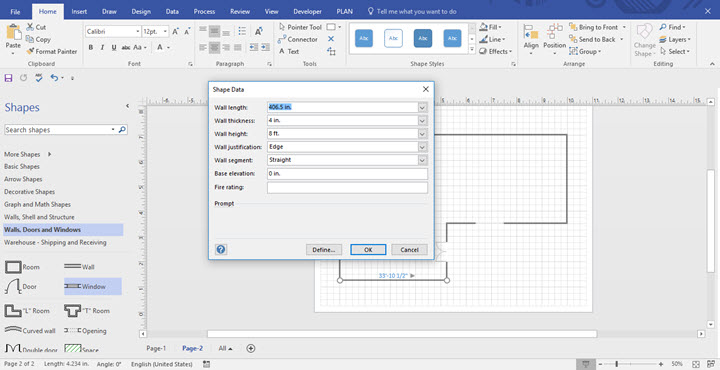
If you want to adjust the thickness, height, length or elevation, then select the wall right click on the properties. A shape Data window will appear. There you can fill manually and adjust.
Microsoft Visio 2016 Step by Step Book by Scott A. Helmers
Perfect book for the basic use of MS Visio. Helps to learn more about the functions in Visio and also simple drawings.
It is a great How to guide for visio basics
More Microsoft Visio Tips
Shortcut Keys to work Faster in MS Visio
How to Create Mirror Image of a Shape in Visio
How to add shapes evenly in Visio
Convert Visio to Custom Sized PNG Files
How to draw Stairs while drawing floorplan
Visio Viewer for iPad and iPhone for free from Microsoft
How to Change the Page Scale in Visio Without Disturbing the Alignment


Trackbacks/Pingbacks