Rustic home decor has a unique charm that captures the essence of simplicity and timeless elegance. It combines the warmth of natural materials with the rugged beauty of the past. Vintage paint techniques can play a pivotal role in achieving this aesthetic, adding character and personality to your living spaces. Some vintage paint techniques that can help you achieve that timeless rustic elegance in your home.
1. Chalk Paint Distressing: Adding a Weathered Finish
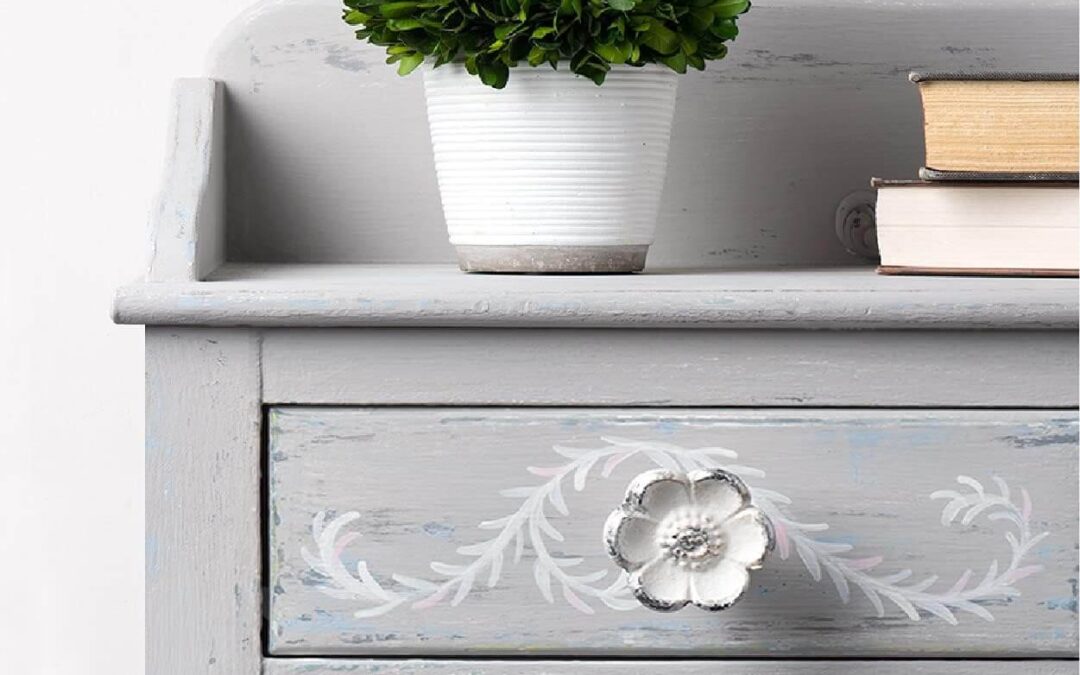
Chalk paint is a versatile medium that can work wonders in creating a rustic look. To get started, choose a muted, earthy colour that complements your existing decor. Once the paint dries, you can distress the surface to mimic years of wear and tear. Gently sand the edges and corners, revealing the base colour beneath. This technique gives your furniture or walls a weathered appearance that instantly adds a touch of rustic charm.

2. Whitewashing: Creating a Faded, Aged Effect
Whitewashing is a vintage paint technique that imparts a subtle, aged look to wooden surfaces. It involves diluting white paint with water and applying it in thin, uneven layers. The result is a faded, almost ethereal finish that makes any piece of furniture or wall look as though it’s been in your family for generations. Whitewashing is an excellent choice for achieving a rustic, shabby chic look.
3. Milk Paint for a Classic, Time-Worn Appearance
Milk paint has been used for centuries, and its natural ingredients contribute to its unique, aged appearance. This paint creates a beautiful, flat finish that emphasizes the texture and imperfections of the wood beneath. It chips and cracks naturally, giving your furniture that coveted, time-worn patina. Milk paint is a classic choice for those seeking an authentic rustic look.
4. Stencilling and Stamping: Vintage Patterns for Extra Character
Adding vintage patterns through stencilling or stamping can elevate your rustic decor to the next level. Whether it’s a floral motif on a dresser or a classic checkerboard pattern on your dining table, these details can create a charming, aged appeal. When using this technique, select colors and designs that complement your overall decor theme.
5. Layered Paint Finishes: Depth and Complexity
For those looking to achieve a more complex rustic look, consider layering multiple paint colors. Begin with a base coat, and then apply additional layers in different shades. Afterward, sand the surface strategically to reveal the underlying colours. This technique adds depth and character, giving your furniture or walls a rich, well-worn appearance.
6. Faux Aging with Tea or Vinegar
For those looking to achieve a more complex rustic look, consider layering multiple paint colors. Begin with a base coat, and then apply additional layers in different shades. Afterward, sand the surface strategically to reveal the underlying colours. This technique adds depth and character, giving your furniture or walls a rich, well-worn appearance.
A Step-By-Step Guide to Creating an Antique Patina with Vintage Paint Techniques
There’s something enchanting about the timeless allure of antique patina. The graceful, aged look that antique furniture and decor items possess has a unique charm that can transform any space into a place of history and character. If you’re looking to create this antique patina using vintage paint techniques, you’re in the right place. In this step-by-step guide, we’ll walk you through the process of giving your furniture or decor pieces that beautiful antique appearance.
Materials You’ll Need:
- Wooden Furniture or Decor Piece: Choose an item that you want to give an antique patina. This could be a wooden table, chair, picture frame, or any other suitable object.
- Sandpaper: Various grits of sandpaper, ranging from coarse to fine.
- Vintage Chalk Paint: Select a muted, earthy color that complements your decor theme. Chalk paint works well for creating an antique look.
- Wax or Varnish: A clear wax or varnish will protect your finished piece and add depth to the patina.
- Paint Brushes: Different brush sizes for applying paint and wax.
- Clean Cloth: For wiping away excess paint and wax.
- Water and Soap: For cleaning and prepping your piece.
- Optional: Aging Solution: An aging solution can be used to accelerate the patina process, creating a more authentic antique appearance.
Step 1: Prepare Your Piece
Begin by thoroughly cleaning your piece with a mixture of water and soap. Ensure it’s free from dust, dirt, and any previous finishes. Let it dry completely.
Step 2: Sanding for Texture
Using the coarsest grit of sandpaper, gently distress the surface of your piece. Focus on areas that would naturally show wear and tear over the years, like corners, edges, and any details in the wood. This step creates texture and helps the paint adhere better.
Step 3: Apply the Base Coat
Now, it’s time to apply your vintage chalk paint. Use a paintbrush to cover the entire piece with a thin, even layer of paint. Let it dry completely.
Step 4: Layering for Depth
To achieve an authentic antique patina, consider applying multiple layers of paint. Each layer should be a different, complementing color. After each layer dries, lightly sand specific areas to expose the layers beneath, creating depth and character.
Step 5: Aging Solution (Optional)
If you want to age your piece further, consider using an aging solution. These solutions can accelerate the patina process, darkening the paint and enhancing the antique look. Follow the product instructions and experiment on a small, inconspicuous area first to achieve the desired effect.
Step 6: Wax or Varnish
To protect your antique patina and add depth, apply a clear wax or varnish. Use a clean brush to spread a thin, even layer. The wax or varnish will also give your piece a subtle sheen, mimicking the natural patina of aged wood.
Step 7: Distress and Buff
After the wax or varnish dries, use a fine-grit sandpaper to distress the piece further, especially on areas that would receive the most wear over time. Buff the piece with a clean cloth to achieve a soft, matte finish.
Step 8: Final Touches
Inspect your piece and make any necessary touch-ups. If you’ve used an aging solution, ensure the patina appears even and natural. You can also apply additional layers of wax or varnish for more depth and protection.
Creating an antique patina with vintage paint techniques is a rewarding endeavour that brings a sense of history and elegance to your decor. By following this step-by-step guide and experimenting with colours and techniques, you can transform ordinary furniture and decor items into timeless treasures that will infuse your living space with character and charm. Enjoy the journey of creating your antique patina masterpiece and watch your space come alive with the allure of the past.
Incorporating vintage paint techniques into your rustic home decor project can be a creative and fulfilling endeavour. These techniques not only add timeless elegance to your space but also allow you to infuse your personality and style into your home. Whether you’re working on a furniture restoration project or refreshing your entire living room, vintage paint techniques will undoubtedly help you achieve that rustic, timeless look that never goes out of style. Embrace the past, and let the charm of vintage paint techniques transform your home into a haven of timeless elegance.
This post contains affiliate links, which means we may receive a small commission, at no additional cost to you, if you make a purchase through these links.
More Reads