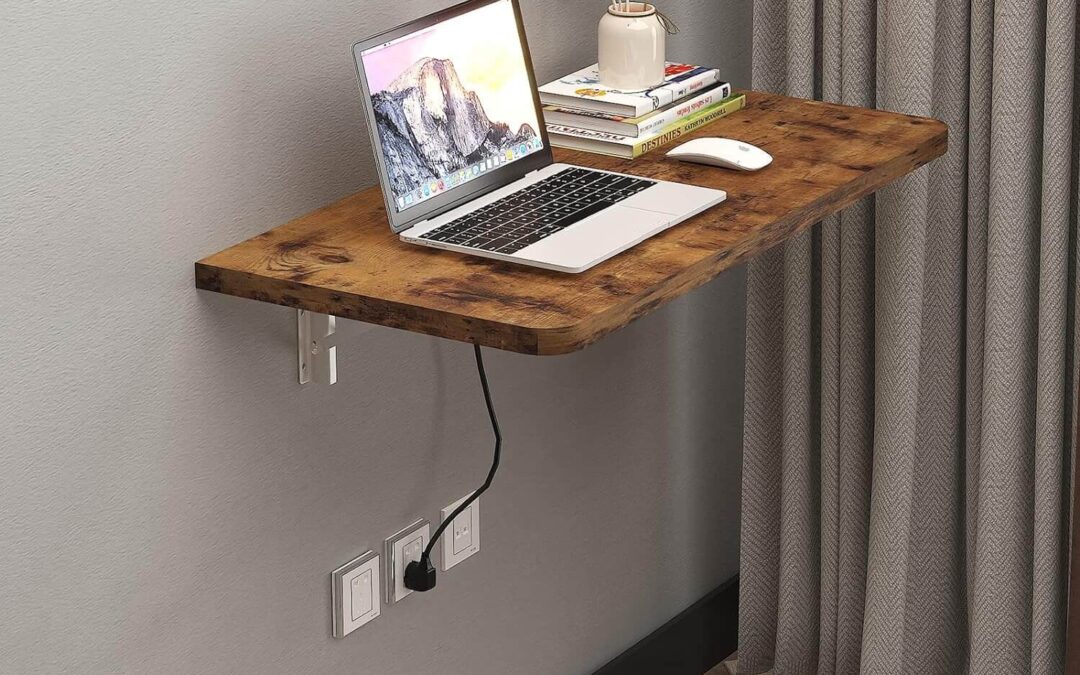
Creating a DIY Floating Wall Table can be a fun and practical project. It’s a great way to save space in a small room and add a functional piece of furniture to your home. Here’s a step-by-step guide on how to make a basic floating wall mount table:
Materials You’ll Need for DIY Floating Wall Table
- Two wall-mounted shelf brackets (the number depends on the size of your table)
- A wooden board (the size of your choice)
- Screws
- Level
- Wall anchors (if not attaching to wall studs)
- Drill
- Screwdriver
- Sandpaper
- Stain or paint (optional)
- Polyurethane (optional, for added protection)
Item 1 and 2 is the only required one. If you are looking into this article, then you must be the one interested in DIY and will surely have tools like Drill, Level, Screws, Screwdriver etc.. Sandpaper, paint, Polyurethane is really not required if you are getting a readymade wooden top. Still I have linked to all the items in case you are a beginner.
If you are looking for a laminate top, you can check this link, Laminated Wood Top. All the shopping links are from Amazon. Please feel free to click and check the items if it is matching your style.

Step-by-Step Instructions:
1. Measure and Plan:
– Determine the size and location of your floating wall table. Make sure it’s at a comfortable height and has enough space to accommodate the items you plan to place on it.
- Select the Wood:
– Choose a wooden board that fits the dimensions you want for your table. You can have it cut to size at a home improvement store or do it yourself.
- Sand and Finish (Optional):
– Sand the wooden board to smooth any rough edges or surfaces. You can also apply a stain or paint for a more finished look. If you use stain, allow it to dry completely before proceeding. You can also add a layer of polyurethane for added protection.
You can ignore Step 3, if you are shopping a Hardwood top. It will have the right finish. Just make sure to check your size required.

4. Install Wall Brackets:
– Locate the wall studs in the chosen area for your table using a stud finder. If you can’t mount the brackets directly into wall studs, use wall anchors.
– Position the shelf brackets at the desired height on the wall, making sure they are level. Mark the screw hole locations on the wall.
- Attach Brackets:
– Drill pilot holes at the marked locations on the wall.
– Secure the brackets to the wall using screws, making sure they are level and firmly attached.

- Attach the Wooden Board:
– Place the wooden board on top of the brackets, ensuring it’s centered and secure.
– Use screws to attach the wooden board to the brackets. Be sure to use screws long enough to go through the board and into the brackets securely.
- Test Stability:
– Carefully test the stability of your floating wall table by placing some weight on it. Make any necessary adjustments to ensure it is securely attached to the wall.
- Final Touches:
– Clean up any excess dust or debris from the installation process.
– Decorate and organize your new floating wall table to your liking.
Remember to follow safety guidelines when using tools and ensure that your table is securely attached to the wall to prevent accidents. The specific measurements and materials used can vary depending on your preferences and the space you’re working with, so adjust as needed to fit your design vision.
This post contains affiliate links, which means we may receive a small commission, at no additional cost to you, if you make a purchase through these links.
More Reads